
Painting Agile Wallabies in Gouache (Alphabet Superset Project Part 1)

Alphabet Superset
This is part 1 of 26 of my Alphabet Superset Project (a project/challenge set up by Youtuber Campbell Walker @struthless). In a nutshell, the project is to create a piece of work around a letter of the alphabet each week, with a few recovery weeks in between. All in all, the project is expected to last until the 8th of April 2024.
Here is Campbell’s video explaining the whole thing.
The other part to this project is consistency in medium, style and output - everything remains the same except the thing you’re making, which changes based on the letter each week.
Why am I doing this project?
The simplest reason is that I wanted a structured project with deadlines I would commit to. While I paint very regularly and often in themes around places I’ve been or types of things I’ve seen (flowers, birds etc), it tends to be what I feel like, when I feel like. I often mean to post about it and go back over my progress in a systematic way, but I’ve rarely done that. I still intend to continue to paint what is inspiring me at the moment, especially with sketching and in my smaller A6 and A5 sketchbooks, but I wanted a project that would give me specific outputs every week in a manageable way.
How did I pick what I wanted to do with the project?
Well I didn’t really have too many thoughts around this to be honest. As soon as I saw what the project was, I knew I wanted to use it to finally paint the many many animals we have seen in the last few years of living and travelling in various parts of Australia and overseas. We’ve been so lucky to have seen some amazing animals in the wild, and Australia has so many stunning animals beyond the usual ones everyone thinks of.
I wanted to paint animals I felt so lucky to have seen on the wild, and hopefully in some small way show/tell more people about some of these other gorgeous and interesting creatures we're lucky to have on this continent.
There are definitely some animals on the list that most people will know, but I bet there are tons very few will be familiar with/think about when thinking about Australia and Australiana. The constraint I did give myself though was that these animals would have to be:
Australian animals or ones that visit
That I have seen
Ideally that I have my own reference photos for
Interestingly, I have a list that will probably take me over a year of painting every week to be able to paint it all, but on the plus side, it was not too hard to find animals for each letter of the alphabet that fit all of the above criteria (except for U and X). In many cases, I had too many options. Which just showed me again why I really wanted to do this project. There are so many animals I want to paint. I’d also like to paint more reptiles and actually paint some Australian mammals, which I’ve yet to do properly.
My only other thought was to use each week to research a traditional craft beginning with that letter (another love of mine is learning about traditional crafts from around the world), but that is a much bigger project and something I might just do without the rigidity of this sort of structure for now.
My Constraints
The constraints I have set myself are:
What I do: Paint an Australian Animal (or ones that visit)
Medium: Gouache
Communication Medium: This blog and instagram
What I’ll paint on/in: a B5 Etchr hot press sketchbook
Style: Semi-realistic - the way I usually paint. The subject is recognisable and looks like the thing, but does not have to be photo-realistic or perfectly scientifically accurate
I’ll be using a composite of my and my partner Scott’s photos
Part 1: A - Agile Wallaby
This one was not difficult to decide. As soon as I thought about the letter A, I thought of painting an Agile Wallaby.
What are Agile Wallabies?
Agile Wallabies (Notamacropus agilis) are cute wallabies that true to their name, make you remark at their agility. They bound about so quickly and sleekly.
In Australia, their range extends from northwest Western Australia across through the northern parts of the Northern Territory and far north Queensland then down the Queensland coast. They are also found in the southern parts of Indonesian Papua and Papua New Guinea.
We first saw them in Litchfield National Park in the Northern Territory all the way back in November 2021. They are very common in north Australia, and we’ve since seen them many times through the northern parts of the territory, along our travels across the Kimberley region in Western Australia and now again in Cairns.
There are however a few different sub-species of them. The particular ones I’ve chosen to paint are from the Northern Territory.
Why Paint them?
I just love the distinctive white and black stripes on their cheeks and their sleek lines. Like so many of the animals on my list for the next few months, I’ve been meaning to paint them for ages.
Process - Part 1: Find Photo References, Sketch
The first part was just going through all our photos to find some I liked with decent enough quality to paint from. We have seen so many of them now that we clearly thought they were too common to take too many photos of which made the painting harder. I thought I’d have TONs of photos of them, but because we’ve often seen them in motion, or at dusk and dawn, the light and focus hasn’t been the best in many of the photos. That said, I did have enough to go on.
Then sketching them. Through this process I tried a tip I’d learnt from Youtuber Margot Hallac (@pointebrush) which is to use tracing paper to test out elements and composition.
I’ve embedded the video here if you’re interested. She runs a wonderfully helpful Youtube channel, and has a lot of other really useful videos.
My usual painting process is find a nice spot, sketch the view or thing or, find a photo I want to sketch and then sketch or paint that or a section thereof in my way. I rarely worry about composition unless I’m doing a piece for someone else or for a specific purpose like when I was creating some batik pieces in workshops I did while travelling Malaysia and Indonesia. That’s usually because my “composition” selection comes at the stage of selecting the scene or photographing it to paint later or selecting a nice photo of Scott’s, or asking Scott to take a specific photo.
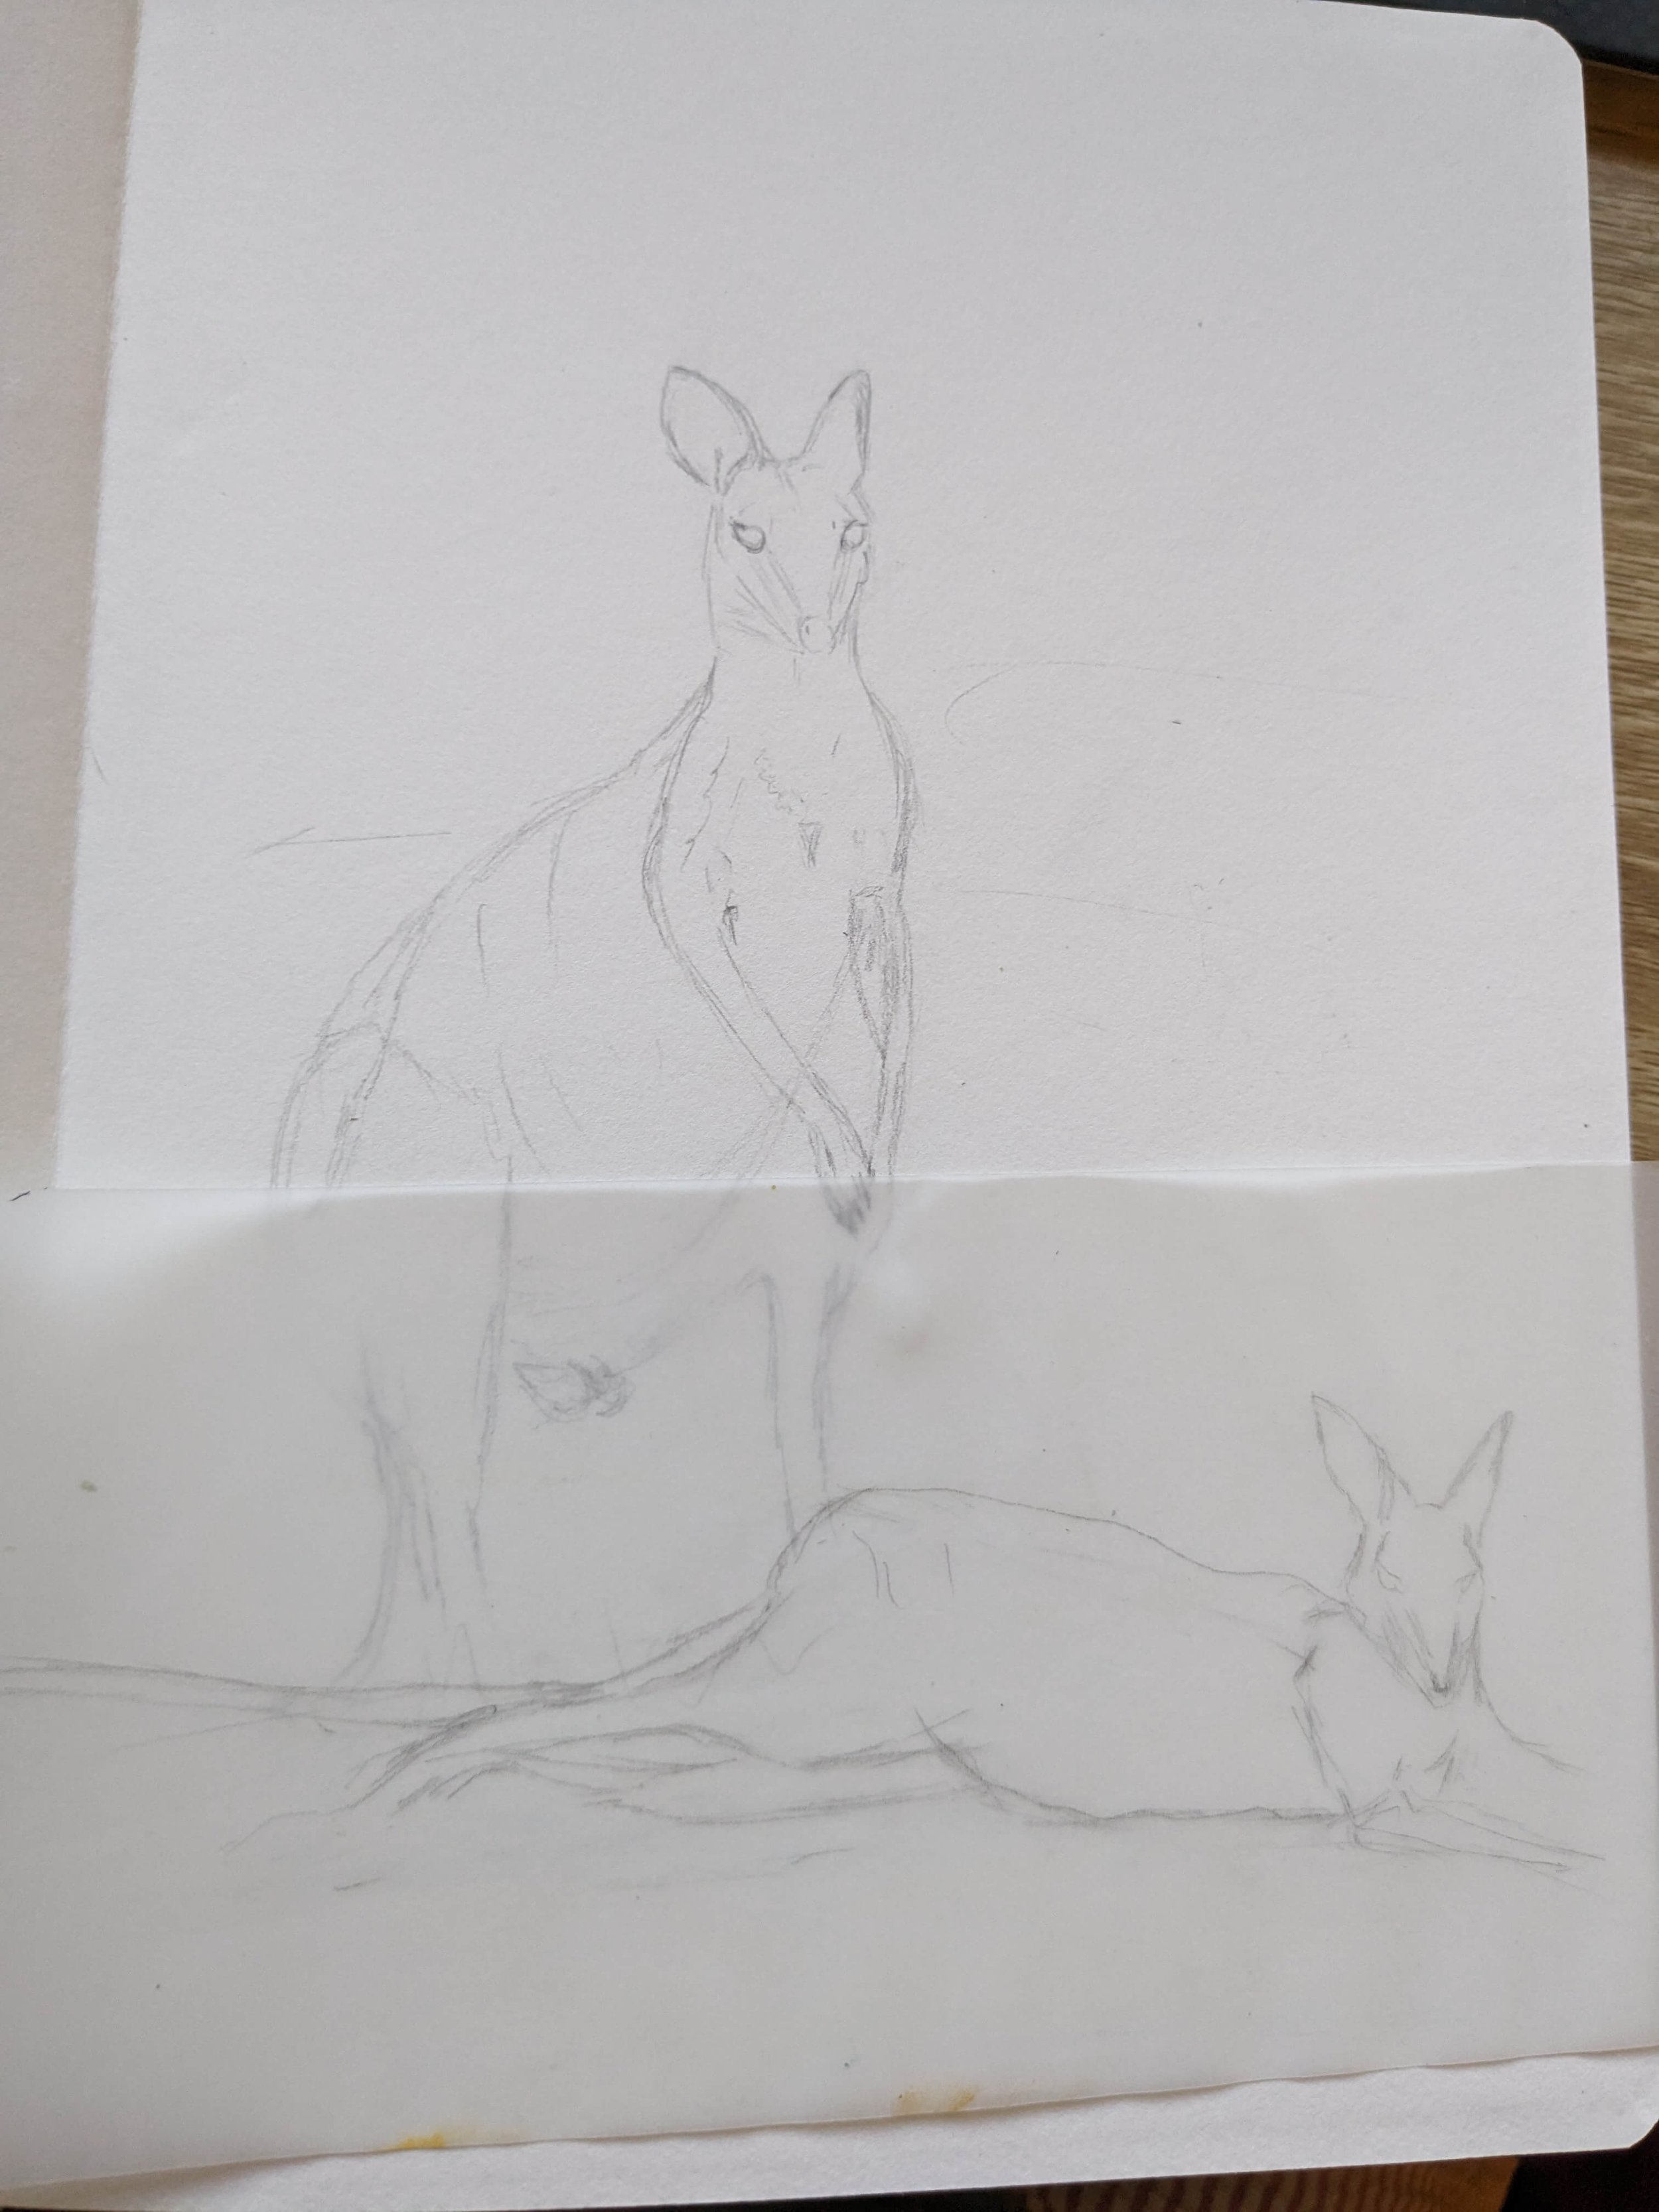
Sketch with the incredibly useful tip about tracing paper to decide composition from Margot Hallac’s video.
That said, this project is a bit different. In some weeks I want to combine two or more animals or two or more of the same animal from different photos. For this one, I wanted to combine a couple of wallabies, and after sketching the first wallaby, I realised I should have decided on the full composition first. So I backtracked, found a tiny bit of tracing paper and sketched my second wallaby on it, and used that piece to work out where in the page I wanted to place that second wallaby.
Lesson learnt: sketch potential animals and poses on tracing paper first to try different ways of putting them together on the page. Honestly, such a useful tp, and one I’ll be using from now on.
Process - Part 2: Work out colours, paint the background
I knew I wanted contrast between the wallabies and the background but for it to still reflect the sorts of colours in the places we’d seen them so after testing a couple, I chose a bright green for the background which looks lovely contrasted against the greys, browns and ochres of the wallabies.
Sadly, I didn’t take a photo of the mess it looked like when I had just roughly painted the background.

In progress - colours, composition worked out, but still a lot of refining to go though it doesn't necessary look it.
Process - Part 3: Paint the Wallabies
Painting one wallaby was easier than the other. The one standing up took quite a bit more fiddling with but, at this stage, I was just painting in the solid ochre colour first. Again I didn’t take enough photos of the steps: solid colour, followed by adding in some detail, the eyes and some shading. Here is what it looked like at the end of day 3 of painting:
Process - Part 4: Refine, refine, refine
This part took way longer than I thought. Two more solid sessions later, I finally was happy enough to consider it done for the moment. This is my first ever proper Australian mammal painting, and it is an interesting start to the journey where hopefully, I’ll be painting quite a few more of the gorgeous mammals we’ve seen in the last few years.

A version I tried with cutesy grass. Didn’t like it.

Here is the final version that I am happy with.

The only thing I’m a bit unhappy about is that I didn’t realise the next page was slightly stuck to the top page and so there’s a line along the tails where that page folds, but oh well.
Next week: B - Brolga and the Black-necked Stork
I’m so looking forward to next week. I’ll be painting a Brolga and a Black-necked Stork or ‘jabiru’. I initially thought of doing the Black-necked Stork in J-week, because it is commonly known as a Jabiru in Australia but, that’s not technically correct. A Jabiru is a South American stork that is quite different to the Australian one. The Australian bird is a Black-necked stork. And also, I just really want to paint the Brolga and Black-necked Stork together. They’re both stunning, iconic birds in north Australia that we’ve often seen in the same places. So the Jacana will be moved to J and I’ll do a different bird in C-week. See you next week!